|SYSTEMS PROTOTYPES|
Low scope systems prototypes
Low scope systems prototypes
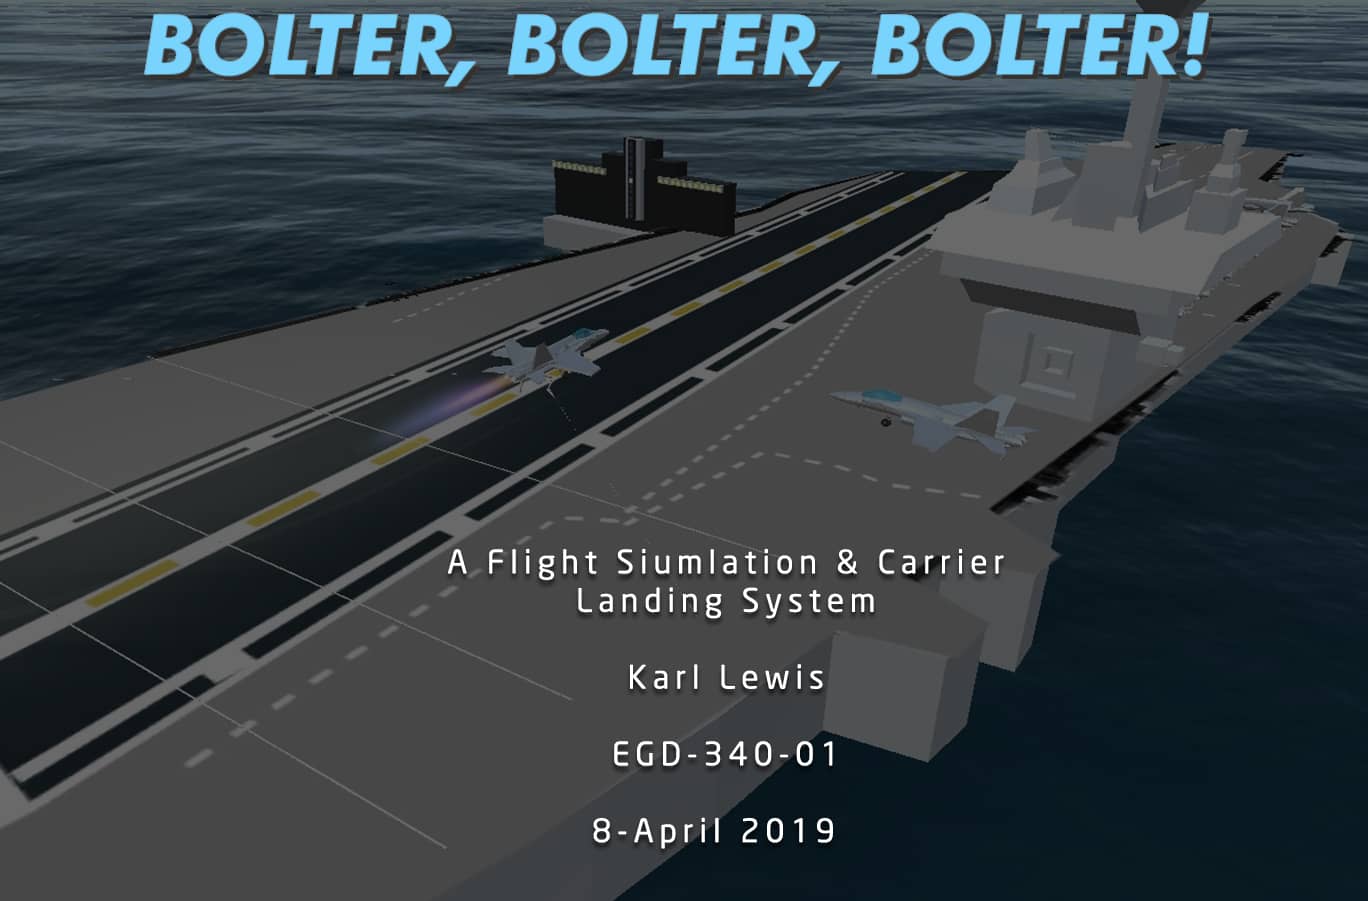
Immersive flight simulation with real physics and carrier landings
TEAM SIZE: Individual
ROLES: Design, Programming, Audio, Art
TOOLS: Unity 3D, C#, ProBuilder, Ableton Live
DEVELOPMENT TIME: Three weeks
PLATFORM: Windows
By creating a jet fighter operation system that uses realistic cockpit heads up display controls and reticles, visual and auditory feedback to indicate the speed, orientation & fuel supply of the plane, and realistic flight physics all within a carrier landing scenario, I intend to create an immersive and realistic flight simulation and carrier landing experience where players feel like an ace Navy pilot.
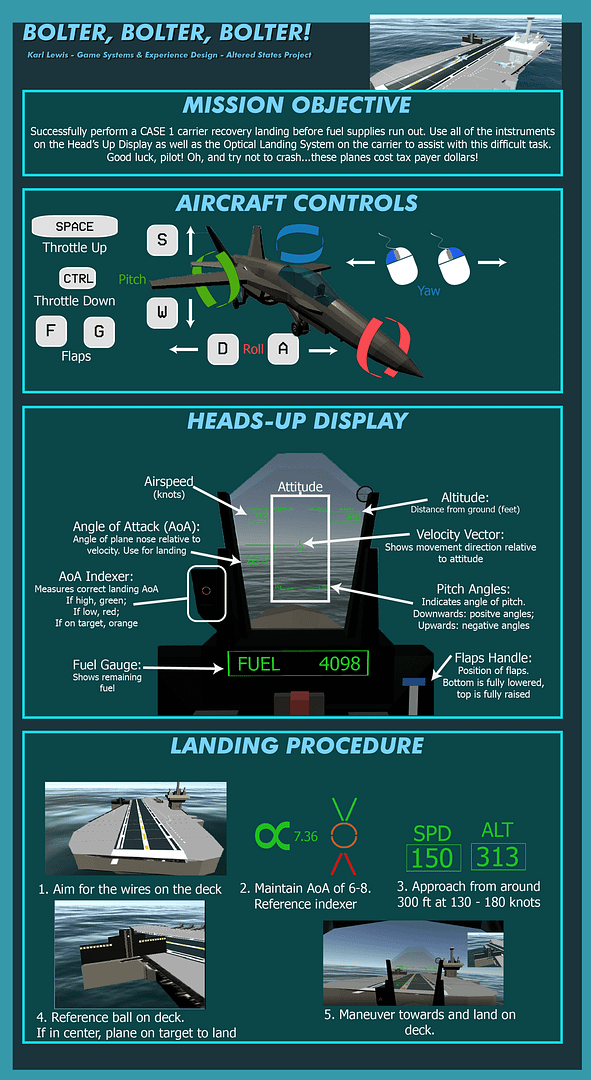
A lot of games revolving around flight and airplanes (that aren’t full blown simulations) often use more “arcadey” controls for flying the planes, which is a useful design choice for making the player feel more empowered, but can hurt immersion for many players looking for more realistic feeling controls. These sorts of games also usually revolve around combat and neglect things like realistic landings, especially when it comes to aircraft carriers. I wanted to do the opposite of this with my system; instead of providing immersion through combat, I aimed to fully immerse players through the feeling and visuals of the plane and cockpit as well as more realistic simulations of take off and landing.
To do all this, I planned to place the player inside the cockpit of a common navy plane (the F/A-18 Hornet) and allow them to look around from a fixed position to see the cockpit HUD, the flight stick and throttle, as well as out the back of the plane to see the wings and such.
Players would be able to move the plane forward and steer it in all directions, but it would not be easy and smooth; real physics forces of lift, gravity, drag, and thrust would all be applied to the plane in real time, making flight more of a balancing act to provide immersion. I also planned to give players the ability see their inputs reflected on the throttle and flight stick inside the cockpit as well as on the various control surfaces on the outside of plane to provide even more immersion. The cockpit HUD displays information such as speed, pitch angle, altitude, and orientation in real time to not only provide immersion but also assist landings. Lastly, to give the player an objective to use these immersive flight mechanics and HUD with, I aimed to make the context focused on returning to the carrier before running out of fuel, which provides both a win and loss state as well as immersion, since the plane is stopped by arresting wires instead of just landing on the deck and the optical lenses of the carrier assist players with getting a level slope to the deck.
I knew from the get-go that I would need to conduct a significant amount of research into several key areas before I could begin building out the system: vehicle interior simulation and diegetic UI, the physics acting on an airplane and how to program them into a game context, the various pieces of equipment used to conduct carrier landing operations, and the procedure pilots conduct during a carrier landing. The games, books, and articles I found relating to all of these areas were all highly influential in the construction of the system. For diegetic UI, especially in military vehicles, I deconstructed one of my favorite games (Squad) which handles immersion in their tanks (there aren’t any aircraft in the game yet) so well because of the diegetic UI and visual effects. I took what I learned from that game and applied the same concept to the HUD of the plane, making the whole HUD diegetic and as true to life as possible. Going into the project, I knew a little bit about aircraft physics but didn’t know how to implement them until I stumbled upon a book called “Physics For Game Programmers”. This book has an entire chapter dedicated to programming flight simulation physics and also goes into detail about each of the various forces acting on a plane (lift, drag, thrust, gravity, air density, etc). This was a fundamentally important part of my research as it gave me the blueprint to implement the flight model. Lastly, I researched the equipment and procedures used in carrier landings through several articles in order to make the carrier landing simulation as realistic as possible, from the various readings on the HUD needed to get the landing right and the optical landing system used to guide the slope of the plane that rests on the deck of the carrier.
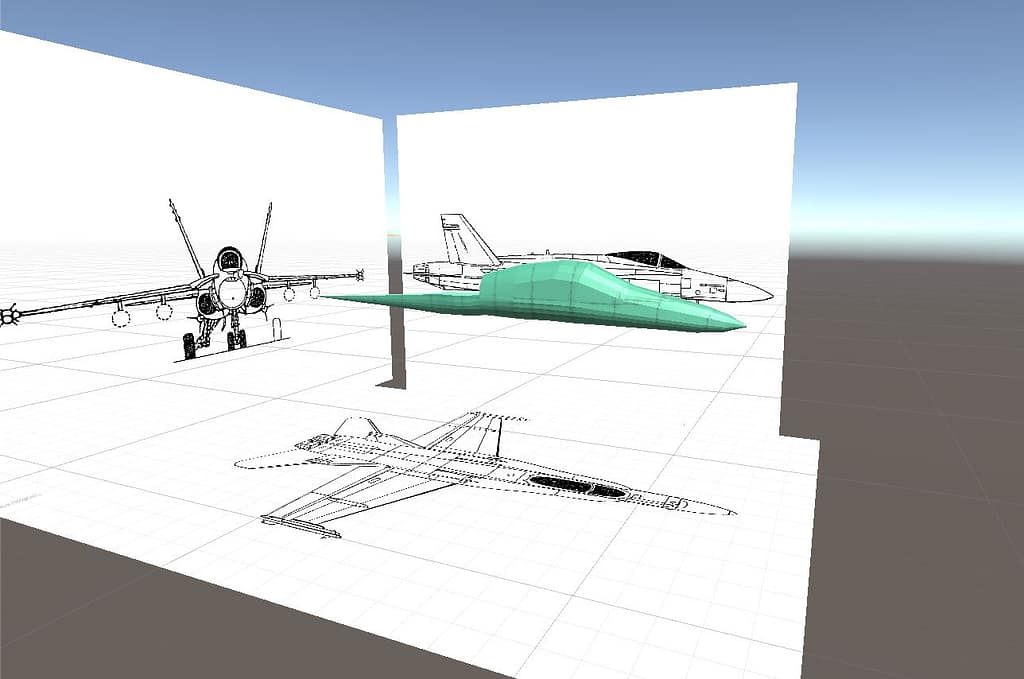
After completing my research, I got right to work on creating the two models I needed for the system: the plane and the carrier. I chose to model the plane after one of my childhood favorite planes: the F/A-18 Hornet. I snagged a couple of reference schematics of the top, side, and front views of the plane and got to work with trusty old ProBuilder.


Once the plane’s exterior was complete, I focused my efforts on carving out the cockpit and modeling the HUD panel that players would spend most of their time in game looking at, as well as putting a first person camera in it. I also quickly made simple throttle and flight yoke models that would be moved around with player input. The modeling went rather quick, but getting the camera to properly work took some time. I had to create a sort of “illusion” around the cockpit that has two chunks that look like the seams of the cockpit glass when viewed from the first person camera but are actually outside of the plane. I also had to make a bigger and more transparent version of the cockpit glass and add a reflection probe to the cockpit area to give off the illusion of looking through glass. It all turned out rather nice once I had the illusion working!


With the plane model done, I moved on to the next major artistic part of the game: the carrier. I modeled the carrier after a Nimitz class supercarrier using some reference schematics. I didn’t get as detailed with it as the plane, but did model the tower out a bit and gave room for some other plane models to sit on the deck. I also made an overlay graphic with the runway and various other markings to give the carrier more detail and also allow the carrier landings to take place. After completing the carrier I turned to modeling one of the system’s mechanics: the IFLOLS, or the optical landing system, that sits on the deck of the carrier. Once again, I got some reference images and sculpted out the shape of the optical landing system in ProBuilder, adding super bright and intense point lights to it at the same time so they could be viewed from far away. Lastly, I knew I needed water but had no idea how to make an endless sort of ocean, so I ended up finding and using the excellent open source water renderer for Unity called CREST. I then topped it all off by sculpting some island terrain with the stock Unity terrain tools and added a stock Unity runway to it to give a place for the plane to take off from.


Before writing any code, I wanted to design and create the head’s up display elements for the cockpit based on the real Hornet HUD. After compiling some reference photos and reading about how it worked, I designed all of the icons accordingly to make them as accurate as possible, from the curve of the pitch angles on the attitude angles (downward pointing ones being positive angles, upward pointing ones being negative angles) to the font of the text displayed on the plane. I didn’t have to make too many elements, only the attitude display, a box to hold the airspeed and altitude numbers in, the angle of attack “alpha α” symbol, the velocity vector, the flaps lever, and the three icons for the angle of attack indexer. The attitude display prompted the need for an additional UI image: a simple overlay of the shape of the HUD screen to use as a mask in Unity. This would cut off the attitude at the edges of the display as it moved and rotated with the plane’s movement, creating the illusion that the attitude was moving on a holographic interface. With all the icons completed and the font acquired, it was time to head into Unity and get the system implemented.


There was a lot to do with this system: a full flight model, working HUD and control surfaces, carrier landing effects and functions, and many, many complex calculations and conversions. I won’t go into detail about everything I made in the system because that would take forever, so instead I’ll explain how I made some of the highlights. Unfortunately, I got so into the stuff I was doing because of the time pressure that I didn’t take as many work in progress GIFs as I should have, so I’ll try and supplement that with code samples and editor GIFs as best I can!
With quite a daunting amount of work ahead of me, I made a list of the order I wanted to do things: flight model first, HUD second, carrier stuff third, VFX and audio effects last.

Starting with the flight model, I spent a whole weekend working with the physics book and other tutorials I found specific to Unity to figure out how all of the physics worked in a Unity rigidbody context. I ended up figuring out that the physics weren’t as hard as I thought they’d be when seated in a Unity context. All I was doing was adding transform.forward forces from the engines for thrust, transform.up forces for lift and pitch, and transform.right forces for roll and banking. Drag is applied by simply multiplying the drag and angular drag properties of the rigidbody by a very very small number that itself is slowly multiplied as speed and altitude increase. Gravity simply just uses the rigidbody gravity system since it is a constant number and works well enough.
The system has several different scripts all working together to get the plane flying realistically; an input manager handles all the input, a controller handles all the other scripts as a sort of hub as well as the mass of the plane, engines handle the thrust forces and fuel, and the physics script performs all the calculations for airspeed, lift, drag, pitch, roll, and yaw. The physics script also handles conversions from meters per second to miles per hour, meters from the ground to feet for altitude readings, and more
When the engines produce enough thrust to make the plane exceed the speed needed to overcome the force of gravity, the lift force being applied finally overtakes gravity, causing the plane to fly into the air on its own. Its a relatively simple way of implementing lift without worrying about all of the lift coefficients and curves. With all of the code written, getting the flight model working as intended became a matter of tweaking all of the variables until everything felt just right, which took a bit of time but came out quite well in the end.


Moving onto the HUD was really exciting for me, because I think that holographic HUD’s like this are super cool and couldn’t wait to implement it after doing crazy physics stuff for a whole weekend. Programming the HUD was actually rather straightforward now that I had the flight model finished: all I had to do was take the values from the physics and convert them into text and display them on a world space canvas. That’s exactly what I did for the airspeed, altitude, angle of attack, and fuel display: took the values, converted them to their respective units (speed from MpH to Knots, altitude from Unity’s meters to feet, etc), and sent the value to text on a string with the HUD font and the box I made around it. Easy.
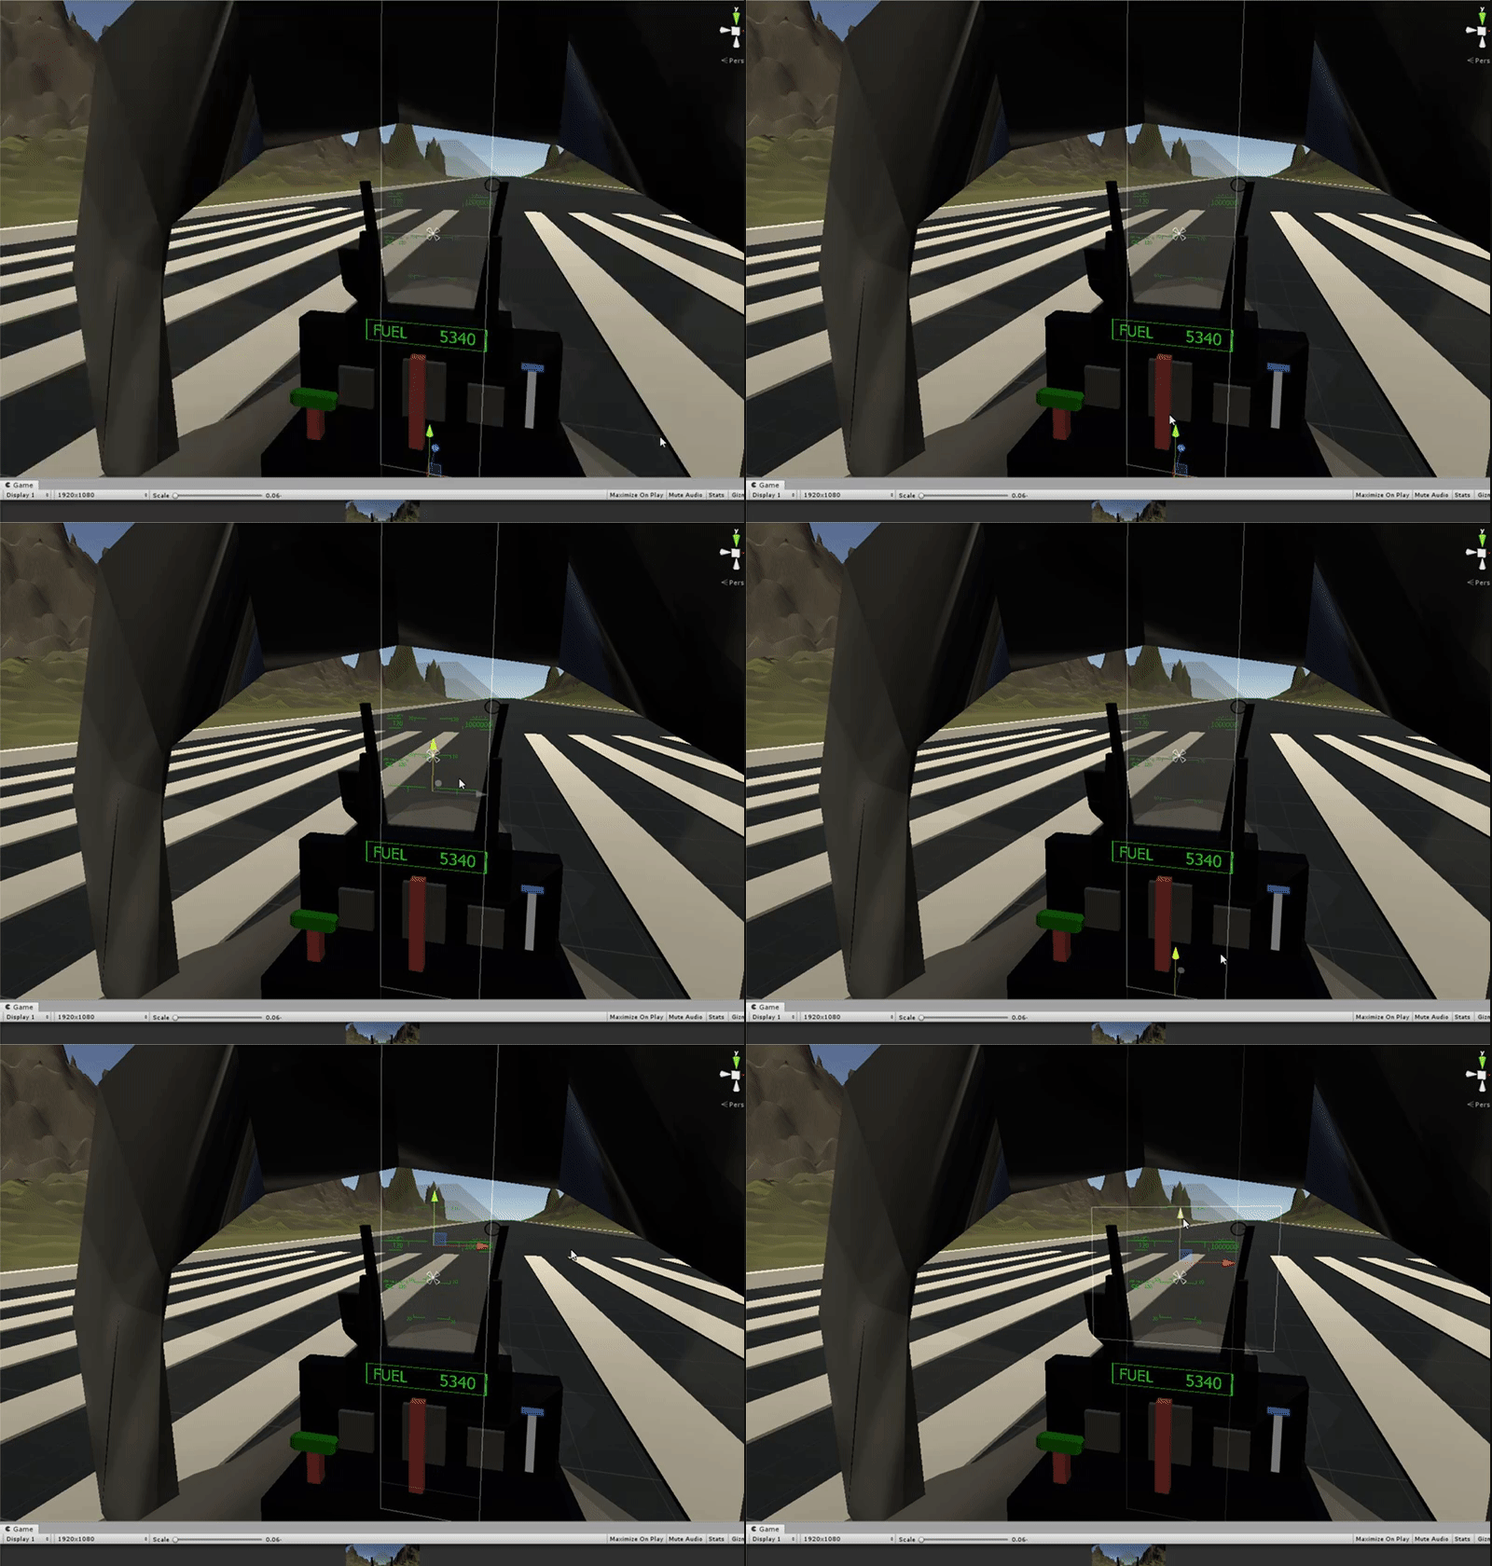
The attitude indicator, however, was a different beast entirely. This indicator shows the pilot the angle of their pitch and roll so they can line up the velocity vector (the little plane shape that almost looks like a crosshair) with it to understand how the plane is currently moving. So I needed to get the angles of the pitch and the angles of the roll (banking angle in this case since its about how the plane is banking) and apply Y axis movement to the indicator for the pitch and Z axis rotation to the indicator for the roll angle. After searching the Unity docs for a bit I came across the Vector3.Dot function, which returns the dot product of two vectors to get the angle between them, and then convert it from radians to degrees to get the correct angle. The bank angle is the dot product between the plane’s right side transform and the world’s upward direction, while the pitch angle is between the plane’s upwards transform and the world’s upward direction. At that point all I had to do was apply these values to the specific rotation properties and adjust them to get them feeling right and it would work. Or so I thought….
The code did what I expected it to do, only there was a problem: since the UI canvas is parented to the plane, whenever the plane moved, so did the attitude icon with it, causing the rotation to go outside of the mask in unnatural ways. On top of this, the pitch angle movement was working but was moving the pivot of the rect transform with it, meaning the roll angle was always rotating relative to an offset position instead of the center of the HUD, which also caused it to go off of the HUD in strange ways. This issue perplexed me for quite a while. I tried experimenting with moving the pivot in code along with the pitch angle, but this didn’t seem to mitigate the effect. After trying various other silly things out of desperation (like making the canvas an overlay thinking that would somehow work…it was very late at night), I stopped for a bit to think about it and had an epiphany…

Since the pivot was what was causing the problems, what if I just made another empty rect transform to child the indicator to and apply the movements and rotations to that instead? That way the pivot of the indicator would always be relative to the pivot of the holder object, meaning it would rotate correctly around the center. After testing this out a bit, it solved the rotation problem, but now the pitch angles weren’t working correctly. I experimented a bit until I figured out that moving the pivot of the holder object instead of its rect transform position was the key. After testing this out, the desired behavior was working! At last! But the indicator was not in the correct position still at start. All I had to do to fix this was offset the position of the indicator so that the highest pitch angle was in the center of the HUD and voila! Correct pitch and roll angle display!
All that was left to do for the HUD after successfully defeating the rect transform beast was the angle of attack indexer, which was simple: if the AoA value from the physics script went above a certain number (in this case it was a range of 6-8), the green arrow would be set active and the others would be shut off; if it went below the range, the red arrow would be set active; if it was within the range, the orange circle would be set active.



Flight simulation? Check. HUD simulation? Double check. Carrier simulation? Next up!
This section was a lot of fun to work on but also had some frustrating caveats because of some physics limitations and problems with the game loop, but I also got to do some cool calculations and simulate a really interesting part of the carrier landing process (the optical landing system, which I’ll get to at the end of this section). The first thing I wanted to do was the arresting wires that the hook of the plane would have to snag in order to land successfully. The wires would stretch out on contact and slow the plane to a complete stop within two seconds, just as they do in real life. Having no idea how to make stretchy things in Unity, I found some info online about making rope like physics with the Cloth component. I made a quick tiered cylinder mesh in Blender for the wires and hooked it up with some “cloth” physics. It took me a bit to figure out how the collisions with the Cloth component work, but once I did, I managed to get a pretty convincing (but very buggy) stretchy effect out of the wires.


Getting the plane to slow down when it hit the wires was a complete pain in the ass. Full stop. This part was not very fun for me at all. I tried seeing if there was a way to make the cloth component have more mass to stop the plane outright but this took away from the effect and eventually just turned into a sort of “brick wall” when it got up high enough. I settled on a script that just sends whatever forward force is being applied to the plane back on itself until its forward speed reaches zero, which at that point the force should stop being sent back on itself. Sometimes it works, sometimes it doesn’t. I have to experiment with it alot more, but the wires were successfully triggering the win state which was okay for the scope of this prototype.
Next came one of the most fun parts of the project: getting the optical landing system to work properly and accurately display the glide slope of the plane to the pilot. This would work by using the glide slope equation (tangent (glide slope = 0.0524) = height / distance) but solving for height: calculating the height of the plane relative to its distance from the landing system by multiplying this distance by a constant glide slope value (optimal glide slope in real life is usually around 0.0524) and converting it to nautical miles. The calculation is continuously performed and it is applied to the local Y position of the “meatball” in the center of the optical landing system, divided by a “localization variable” to keep the number between 2 and -2 (these were the min and max values of the lights) instead of in the hundreds. The value is then clamped to make sure it doesn’t move off of the optical landing system if it gets to high or too low. I was extremely overjoyed when I managed to get this complex math to work relatively easily, and the effect is exactly how it is in real life; the ball moves up or down depending on how on target or off target the plane is to the correct glide slope. If the ball is above the center, the plane is too high; if its below the center, the plane is too low. If its in the center, the plane is on the correct glide path. Not only does it look really cool and add to the immersion, its actually really useful when performing a landing!


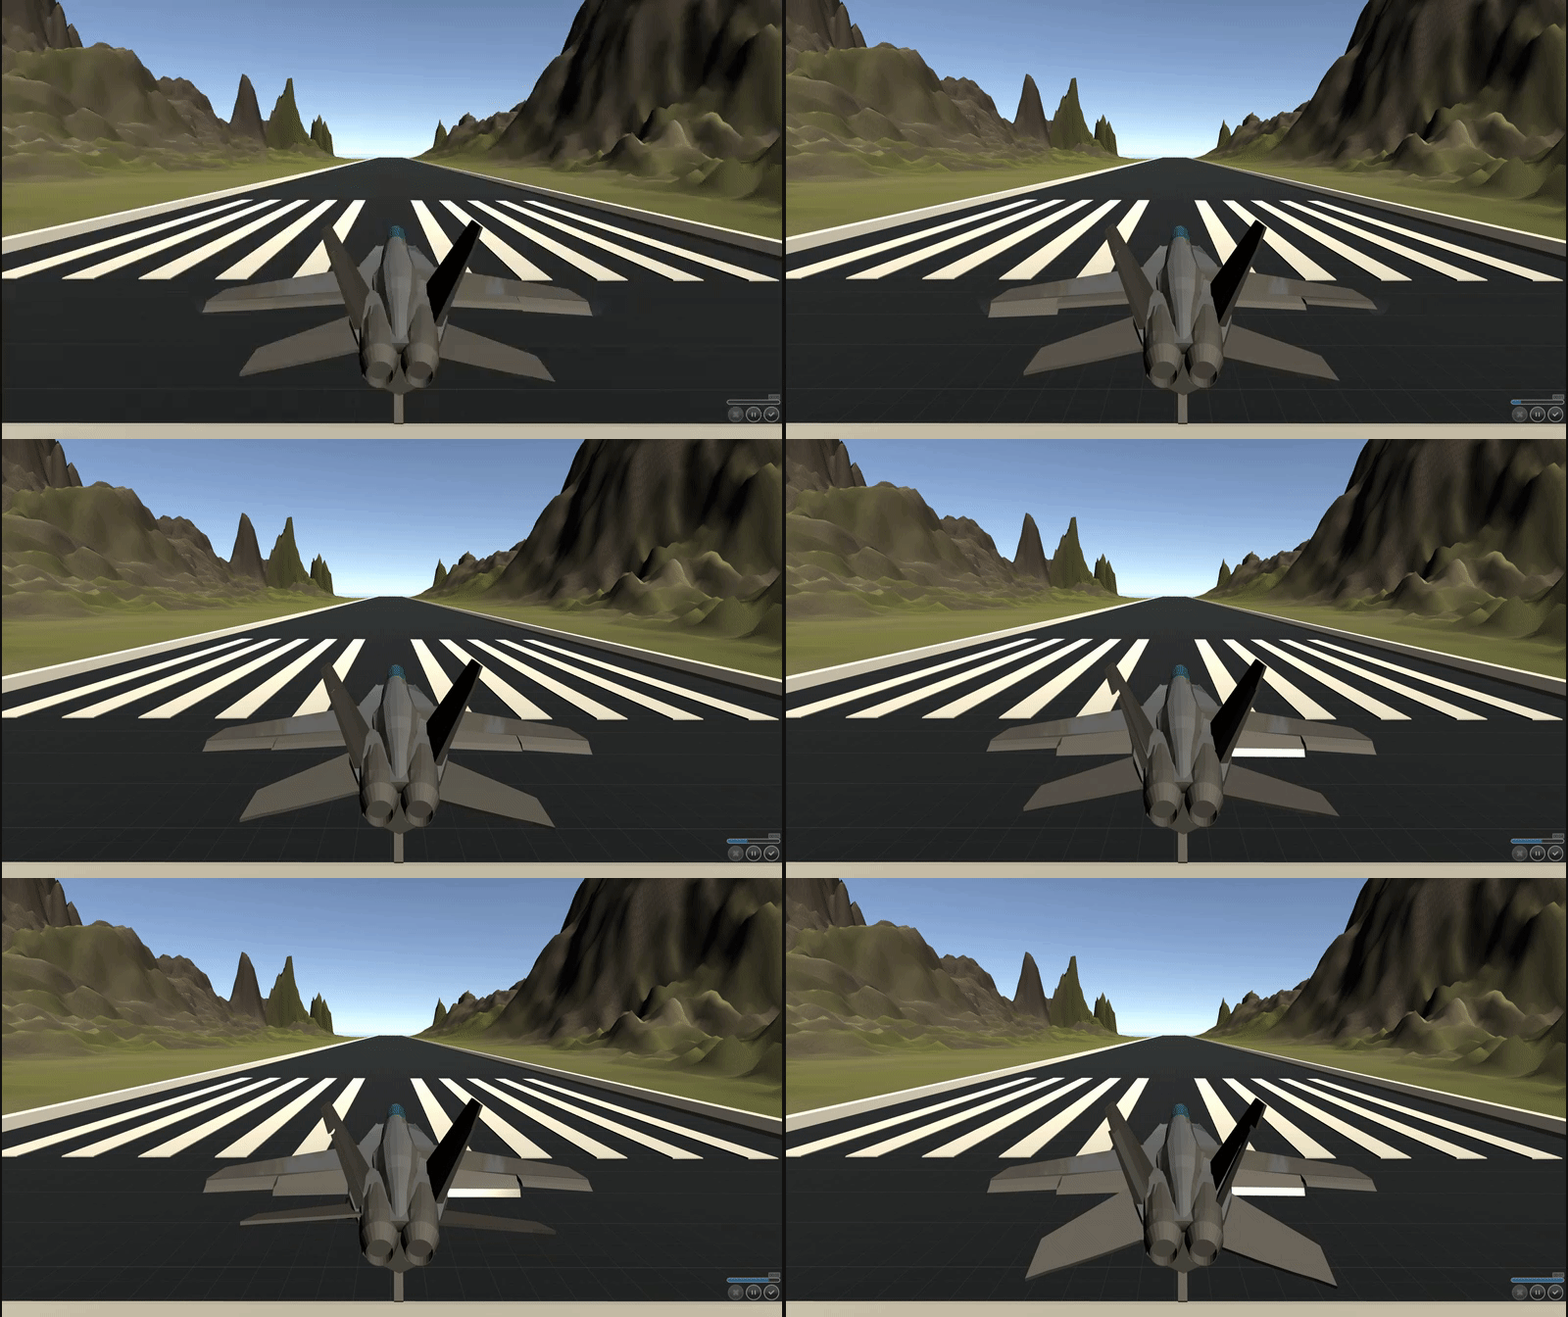
With all the mechanics of the system (finally) programmed and working after a week and a half of hard work, it was time to polish up the prototype to add to the immersion, as this is a project about altered states after all. First, I added the movement to the control surfaces (ailerons, elevators, rudders, and flaps) based on player input using simple smooth lerps on their local rotations, as well as movement for the flight yoke and throttle using the same method. I then added two new camera views, a follow camera and a free look camera, so players could see how the plane moves with input to help them learn to fly. I also added an explosion effect when the plane crashes as well as a fade to black to the loss screen. Lastly, I used the Unity Standard Assets jet particles for the afterburners to give them some effect when using the new camera views. They increase with the throttle value using the provided script. All of these little effects added a lot to the immersion in my opinion, and made the plane feel even more real!


It wouldn’t be one of my projects if I didn’t make some sound effects for it. Since immersion was the focus with this system, I knew I needed to have a really realistic sound of the jet engines from inside the cockpit to get the level of immersion I wanted. Since I unfortunately don’t have an F-18 lying around (man that would be cool though), I had to turn to one of my sample libraries to get a good inside the cockpit hum layer for this effect. I did, however, record a cool layer for this sound. The hand dryers at my school’s library are essentially turbine engines and make these crazy loud wind sounds when they’re activated that immediately sounded like a jet to me when I was using them while making this project. I used my phone to record a quick sample of it and layered it into this sound to quite a good effect. It almost gives off a “breathiness” sort of feel that sounds like the pilot is breathing and also adds to the background noise. I had to do a little EQ and pitch it down 13 semitones to get it to sit right, but it came out really cool in the end. To top it off I added some sounds captured from the ground while planes flew above and muffled them with a filter to add wind hum and ambience to the effect. Listen to the original recording of the dryer (1st clip), the processed version (2nd), and the final cockpit hum (3rd) below:

I made a quick loop for the exterior jet engines using some samples from one of my libraries as well as a sound for the explosion using the explosion I made for the Waveform challenge (finally a good use for it!) as well as some metallic crashing and debris layers. Check them out below!

Summary
Based on the test results and from watching the testers play the game, I can conclude that this system was a resounding success. It succeeded completely in delivering an immersive experience that accurately simulated the flight of an aircraft as well as the procedures and details surrounding a real-life carrier landing. While there are some visual bugs, bugs with the game loop, and it may be too difficult for an inexperienced player to land on the carrier, the system managed to induce players into an altered state where they felt like they were piloting a real fighter jet.
What Worked
1. The flight model accurately replicated the forces acting on a plane
2. The visuals, sounds, controls, and interface of the plane simulated the real thing
accurately and were the primary sources of immersion
3. Flying the plane was easy to understand yet difficult to master
4. The heads-up display accurately reflected its real functions and helped immerse players in the experience
5. Landing the plane was easy to understand despite its complexities due to the accuracy of the HUD
6. Deciding to add the optical landing “meatball” was a wise choice since it added even more authenticity to the experience
What Didn’t Work
1. The fact that testers never managed to land the plane is troubling from a “game” design standpoint. While I didn’t bill this experience as a game when explaining it to testers (instead as a simulation), the objective of landing on the carrier was crucial to the immersion of the experience, and the fact that testers understood how to do it but couldn’t because of the complexity/skill ceiling of the flight model took away from the experience to some degree.
2. I spent a lot of time and energy on this project, mostly because I got really interested in all of the physics and equipment surrounding the simulation. While this isn’t a bad thing (I had an absolute blast making this), I feel that I put way too much time into some of the smaller details like the meatball. I could’ve used that time to polish up the win state surrounding the landing, which is currently really buggy. Which brings me to my next point…
3. Getting the arresting wires to accurately stretch when the hook collided with them was extremely difficult and didn’t work entirely as I wanted it to in the end. This is partly due to limitations with Unity; there isn’t any sort of “rubber” like component that I could find, meaning I
had to use the cloth component to make the wires stretch. Additionally, I had to bootleg the slowdown of the plane when it hits the wires due to time constraints. It currently just applies the force of the plane back on itself, but nothing stops it from doing this when the plane halts, causing it to either fly forwards or backwards off of the deck. More time would be needed to get this whole thing working correctly.
What I Learned
Perhaps my biggest takeaway from the experience of designing this system was that modeling simulations after their real life counterparts is the core of creating an immersive simulation. While this may seem like an obvious takeaway (a simulation exists to simulate reality, after all), I never understood the importance of this until actually building a simulation myself. It takes a true understanding of and appreciation for the real thing in order to succeed in making an immersive simulation, and I feel that I conducted the research necessary in order to do so. My second biggest takeaway was that making an interface part of the game world goes a long way in immersing players into the experience. Choosing to make a fully diegetic UI that accurately replicated the real thing was perhaps the most immersive part of the
experience, and it was a far more effective way of conveying information than placing UI elements on an overlay. Overall, I learned that creating an immersive experience takes a keen attention to detail and relies heavily on visual and auditory feedback, as well as a clean and unobtrusive interface to relay important information.

Skeet shooting FPS with manual weapon controls
TEAM SIZE: Individual
ROLES: Design, Programming, Audio, Art
TOOLS: Unity 3D, C#, ProBuilder, WWise, Ableton Live
DEVELOPMENT TIME: Three weeks
PLATFORM: Windows
By using click and drag mouse inputs to manually pump shells in and out of a shotgun, an immersive first person aiming perspective, and fast moving targets, I intend to create a “skeet shooting” gameplay system that is kinetic in its feel and precision & timing based in its challenges.

I’ve always enjoyed the sport of skeet shooting, especially the kinetic feeling of using the shotgun and the satisfaction that comes from hitting the clay pigeons, and have always wanted to replicate the fun and physical aspects of the sport in a game. Most shooters with shotguns or other manually operated firearms like hunting rifles simply play an animation when a new round needs to be chambered, leaving the player with no possible interactions with the weapon during this time. In real life, however, loading a new round is just as physical as target acquisition and sharpshooting. I strongly feel that the majority of shooter games tend to ignore the potential for a high amount of player interaction with their weapons, and since players spend the majority of their time using these weapons, I figured “why not allow them to interact with their weapons as much as possible?”
Based on this concept, my goal was to create a physicality based system which revolves around the player having to manually pump a shotgun with the mouse before taking carefully timed shots at fast moving clay pigeon targets rather than simply having the pumping be a non-interactive animation. I wanted to create a gameplay loop where the player faces an additional physicality challenge besides simply aiming and moving, and I wanted to make the player feel physically connected with the weapon by means of kinetic interaction and game feel.
To achieve these goals, I conducted a substantial amount of research into the various areas that I wanted to convey through this system: the sport of skeet shooting, kinetic game feel, and reloading systems in games. This research helped generate a lot of ideas for how I was going to create the system, from the ideas of how to program the pumping mechanic and the several different types of game feel and player feedback I would add. I wanted to make sure that the system both played and felt physical. My solution to this was to use the mouse as a means of pumping the shotgun for physical gameplay and implementing recoil on the shotgun model, recoil on the player mouse, screen shake, a punchy shooting sound, smooth weapon following of the cursor, two aiming modes, and flying shattered chunks of hit clay pigeons for physical feeling.
The first thing I decided to do when building the system was to create my own 3D models for the shotgun and the clay pigeons. I had never made a 3D model before and wanted to challenge myself to do so.


With the model finished, I hopped into Unity and started programming the firing mechanics of the shotgun. I got a basic hitscan firing that spreads several pellets over an angle up and running pretty quickly along with some simple particle effects to get a start on the feedback and feel and then moved onto the manual pumping mechanic. To do this, I compared the z position of the pump part of the model against its starting position while also checking if the mouse was moving. If the mouse is moving up while rick click is held, the pump will move up and vice versa.

To increase the realism of the pumping, I added a simple boolean checking function to prevent the player from firing if a shell is not loaded into the barrel after pumping downwards.

Shooting and pumping in their mechanically functional state
Now that the mechanics of the game were functionally complete, I spent the majority of the rest of the creation process focusing on getting the shotgun to feel physical and provide solid player feedback as well as adding a few other mechanics to improve the experience.
I started with some simple recoil on the gun model plus some screen shake, but found this not physical enough. After implementing recoil on the mouse aim that the player must manually compensate for, the visual feel of the shooting was very close to the real thing. I added some extra particle effects when hitting surfaces to give the pellets more feedback.
Even though the crosshair was fine to shoot with, I decided to add a toggle between aiming down the sights and the crosshair to allow for more immersion and precision when aiming. I also added a rotation on the shotgun model when holding down right click to enter pumping mode to allow players to see the pump more clearly.
Lastly on the programming side of things, I got the clay pigeons to fly in arcs, respawn infinitely in different patterns, and have a shattered version of the model that spawns when hit. With the physical feeling shooting, pumping, and shattering of the clay pigeons, the visual feedback of the gameplay was very satisfying and kinetic.
Final versions of the pumping feedback and shooting feedback
With the programming side of things complete, I hopped into Ableton to start creating a really punchy yet still realistic firing sound for the shotgun. I made three main layers that were each subdivided into several different samples: lows, mids, and highs.
I used a beefy kick drum sample for the lows to give the sound a a lot of punch to it. This is the part that you can feel in your chest in real life, so I wanted to make sure it was really present in the mix of the sound.
For the mids, which are the main part of the firing, I used a combination of some public domain shotgun firing samples I found online plus some samples I had recorded at a shooting range of a military rifle. All these samples layered together provided for a very thick and textured mid range.
Lastly, for the highs, I added some foley of a trigger being pulled as well as some gun handling foley to make the gun sound like it was physically being operated. I also chopped up and reversed the trail of one of the mid range samples and bosted its highs to create a longer trail at the end of the shot. While this part of the mix is a bit quiet, without it the gun doesn’t sound as realistic.


After completing the layering, I tied the sounds together with a saturator for more ‘oomph, some EQ to boost parts of the mids and highs, and some multiband compression to glue everything together nicely.
This sample is slightly modified from the one seen in the video. I went back and retooled it by spacing apart the different layers a bit to add more cadence, and I also changed the multiband compression a bit.
For the second version of the project, my main goal was to improve the immersive aspects of the user experience as well as increase the complexity of the game a bit by adding a reloading and ammo system. I also wanted to add a timed game mode to make it into an actual game instead of an endless prototype room. A new level was added, modeled after an outdoor shooting range a forested clearing with a meadow perfect for shooting clay pigeons. All of these new additions were in response to tester feedback, as well as a few minor fixes such as adding a smooth transition between pumping mode and normal mode.
The first new addition I made were the titular shotgun shells that were ironically absent from the original prototype. I made quick models for both new and fired shells with ProBuilder and made a simple system that spawns spent ones when the pump is pulled back, applies a random force and rotation to them, and plays one of six randomized shotgun shell sounds when it hits the ground. This added a nice little detail to immersion; its especially really cool to see all the shells on the ground after playing for a few minutes!
Following this, I made a quick change to the way the hit detection system worked. Originally, hits were detected using multiple raycasts that randomly spread within a given angle radius. While this provided good detection for a prototype, I wanted the shotgun pellets to be physical objects that take time to reach their destination. I replaced the raycasting code with physics projectiles that instantiate during shots. Each of these individual projectiles can hit and destroy a target, meaning the shotgun spread has a real effect on gameplay now!
Next I tackled the reload mechanic. First, I coded the ammunition counting loop relatively quickly thanks to some nice architecture from last time and then made the diegetic ammo UI plate on the shotgun. All I had to do next was hook the UI up to the ammo number. Making the reloading itself was a little bit more tricky. Besides spawning a shell prefab when the R key is held, it uses the same method of checking if the shell is loaded as the pump does (if mouse has positive input, move the model, if the model enters trigger area near the tube, increment the ammo/load shell etc). A problem occurred where the mouse could be held in the upward position and load shells without having to actually flick them in realistically. After experimenting a bit, I got it to work with flicking after adding another Boolean variable that won’t let the shell move unless the mouse position is reset back to zero or a negative number. This provides the desired flicking motion and makes reloading feel as close to real as it can get with the mouse!
After getting the reloading done, I focused on making the time trial game mode which took a bit of time. I had experience making a timer for my production 2 game and it came in handy for this. I also quickly added the same pause menu code from my Altered States system to let players restart, quit, and go back to the main menu. Once this mode was done, I made two separate buttons on the menu to let players either play a time trial or experiment in a freeplay mode with no time limit.


The last thing I did was make the new level. I used references of the shotgun ranges I used to shoot at in real life and went with a mix between a meadow area and a wooden outdoor range. There’s a few separate “stations” that fire clay pigeons out in different patterns. All that was left at this point was tone setting music, so I quickly hopped into Abelton music software and made a little fast paced, 16 bar beat that I think fits decently well. To wrap it up, added post processing effects to make the graphics pop a little bit more and made the new video and VDD to go along with the new features.
What Worked
1. The controls for pumping the shotgun as well as all the other shotgun operations worked exactly as I had originally intended. They were streamlined, simple to understand, and satisfying to use.
2. Operating the shotgun actually felt like operating a shotgun. Testers described the use of the shotgun as physical and kinetic, with those that have used shotguns in real life describing it as realistic. This is mostly a result of the next point…
3. Gameplay feedback to the player was abundant and successful on both visual and audio levels. The use of particle effects for the pellet impacts, muzzle flash and gun smoke managed to go a long way in making the game feel be perceived as physical. Including shattering on clay pigeons when they were hit was a good choice for feedback, as hitting the clays was described as satisfying by the testers. Creating a punchy and powerful sound effect for firing the shotgun paid off, as some testers said the audio was realistic and added to the physicality of the game feel. Lastly, even though I struggled with programming the vertical mouse recoil, it was a huge part of getting the game to feel physical, as it provided actually kinetic feedback to players to indicate that the gun was moving without their input.
4. Using clay pigeons as targets made the experience much more physical than it would’ve been with large stationary targets. Since the clays moved in predictable arcs, it also allowed players to become skilled with lining up their sights in these arcs and firing at the precise moment the clay entered their sights. Additionally, having multiple clays spawn at different times and in different spots at one of the stations provided a nice physicality challenge, as players had to move their mouse quickly to get combos on clays in different locations
What Didn’t Work
1. The pumping speed of the shotgun didn’t seem to matter to most of the testers. Originally, the pump was supposed to respond exactly to the speed at which the mouse was being moved by the player, meaning the faster the mouse was moved, the faster the pump would engage. In its current iteration, moving the mouse below or above a certain threshold cause the pump to move towards its target. While this still feels good, it doesn’t offer a certain physical resistance that the pumps have in real life that I would’ve liked to convey.
2. While this is not an issue with the system itself, I spent far too much time trying to get the recoil on the mouse to work. While in the end it was worth it, programming this type of feedback was far beyond my mathematical knowledge of rotations in Unity. The time spent on this feature would have allowed me to focus my efforts on other areas that needed improvement, such as extra sounds for the shotgun and movement as well as a scoring system based on accuracy on the clay birds.
What I Learned
Perhaps my biggest takeaway from the experience of designing this system was that game feel plays a significant part in making a player feel physically connected to their actions. The amount of time spent tweaking the feel of the shotgun, from the screen shake and recoil when shooting it to the sound of the shells falling in the correct direction after pumping, was well worth the effort and without a doubt one of the most substantial factors in making this system a success in terms of physicality. I also learned that a game can have very streamlined controls and still remain a physical experience. Many of the physicality based games that I play, from action games to shooters, often feature rather complicated control schemes to achieve physicality in their game play (e.g Dark Souls, Squad). When designing this experience, I wanted to make sure that my pumping controls would feel natural to use and would eventually become second nature to the players. I believe I succeeded in that regard, as the testing results indicate the players not only found the pumping to be an additional physical challenge in the gameplay but also enjoyed using it. Overall, this experiment taught me that perfecting the feeling of a game’s core mechanics is key to the entirety of the experience. If the shotgun didn’t make any sound, visibly recoil after firing, have no movement on the pump, etc, I think that players would’ve felt very differently about the experience.

Gather intelligence in first person RTS
TEAM SIZE: Individual
ROLES: Design, Programming, Audio, Art
TOOLS: Unity 3D, C#, ProBuilder, Ableton Live
DEVELOPMENT TIME: Three weeks
PLATFORM: Windows
By creating a first person, real time unit movement system, where players use magnified optics to select units and place markers for them in the game world, I intend to create an experience that focuses on strategic positioning and intelligence gathering as players must think about their own tactical position as well as their units’ positions as they reveal enemy locations on an in-game map.

The majority of turn based and real time strategy games with unit management and movement systems simply provide the player with a “god like” overhead view of the map as they act as a sort of “battle commander” or “leader,” which is a useful design choice for showing lots of important information at once. However, often in real life military situations, unit commanders, sometimes called “field commanders,” obviously do not have this perspective on the battlefield and can only know what their troops and scouts report to them. This idea was the original inspiration for my system; I wanted to replicate the feeling of being a field commander overseeing a small number of troops from a position with a limited perspective on the field itself, with most tactical information being relayed directly to the commander by their units.
To do this, I planned to give the player a first-person avatar that can move around, use a scope to oversee their units from afar, select units when looking at them through the scope, and place markers in the world for them to travel to. Additionally, to instill uncertainty, I aimed to cover the game world with the classic “fog of war” that can be cleared by units as they move throughout the world. Players are also given a physical map in their command area that shows the level terrain and also has fog of war which is cleared as units move to give the feeling of units reporting information to their commander. Lastly, to give the player an objective to use these mechanics with, I aimed to make the context more focused around controlling scouts rather than soldiers, as the main goal of players is to identify the locations of all of the enemies in the game world by marking them on the map with the units.
In order to reach these goals, I conducted a substantial amount of research into the various areas that I wanted to convey through this system: unit movement systems in strategy games like Civilization V, good user experience and interface design, how to focus unit management on strategy instead of clicking speed, and ways to add uncertainty into gameplay. This research helped generate a lot of ideas for how I was going to create the system’s feedback loop and interface, namely the beams of light for UI indicators, the automated unit movement after selecting a location, and the randomized starts of enemies plus their obscurement in the fog of war until found. I wanted to make sure that the system was making players think about their position before giving units a movement order to really drive home the feeling of being a field commander and not having a full view of the world. My solution to this was to use a scope to allow distant information to be acquired, obstacles which obscure units and enemies so players have to move around to select and see them, and a map that had to be walked to to use.
Like I did with the physicality system, I first decided to make the 3D model for the main object in the game: the scope. This was the second 3D model I’ve created and I once again used Unity’s ProBuilder tool. It might be high time to learn how to use Maya properly as I started to quickly notice some restrictions in ProBuilder…

With the model quickly completed, it was time to actually make the scope magnify. This was rather easy to achieve, as I simply made a camera attached to an empty game object pointing outwards from the scope’s front hole and turned it into a render texture. I then placed the render texture onto a small circular mesh and positioned it inside the scope. For the crosshairs, I used two separate screen overlays on the scope camera with images of a scope crosshair on them. The reason I used two instead of one is because the center of the crosshairs was very thin and needed the extra layer to be actually visible in the world.
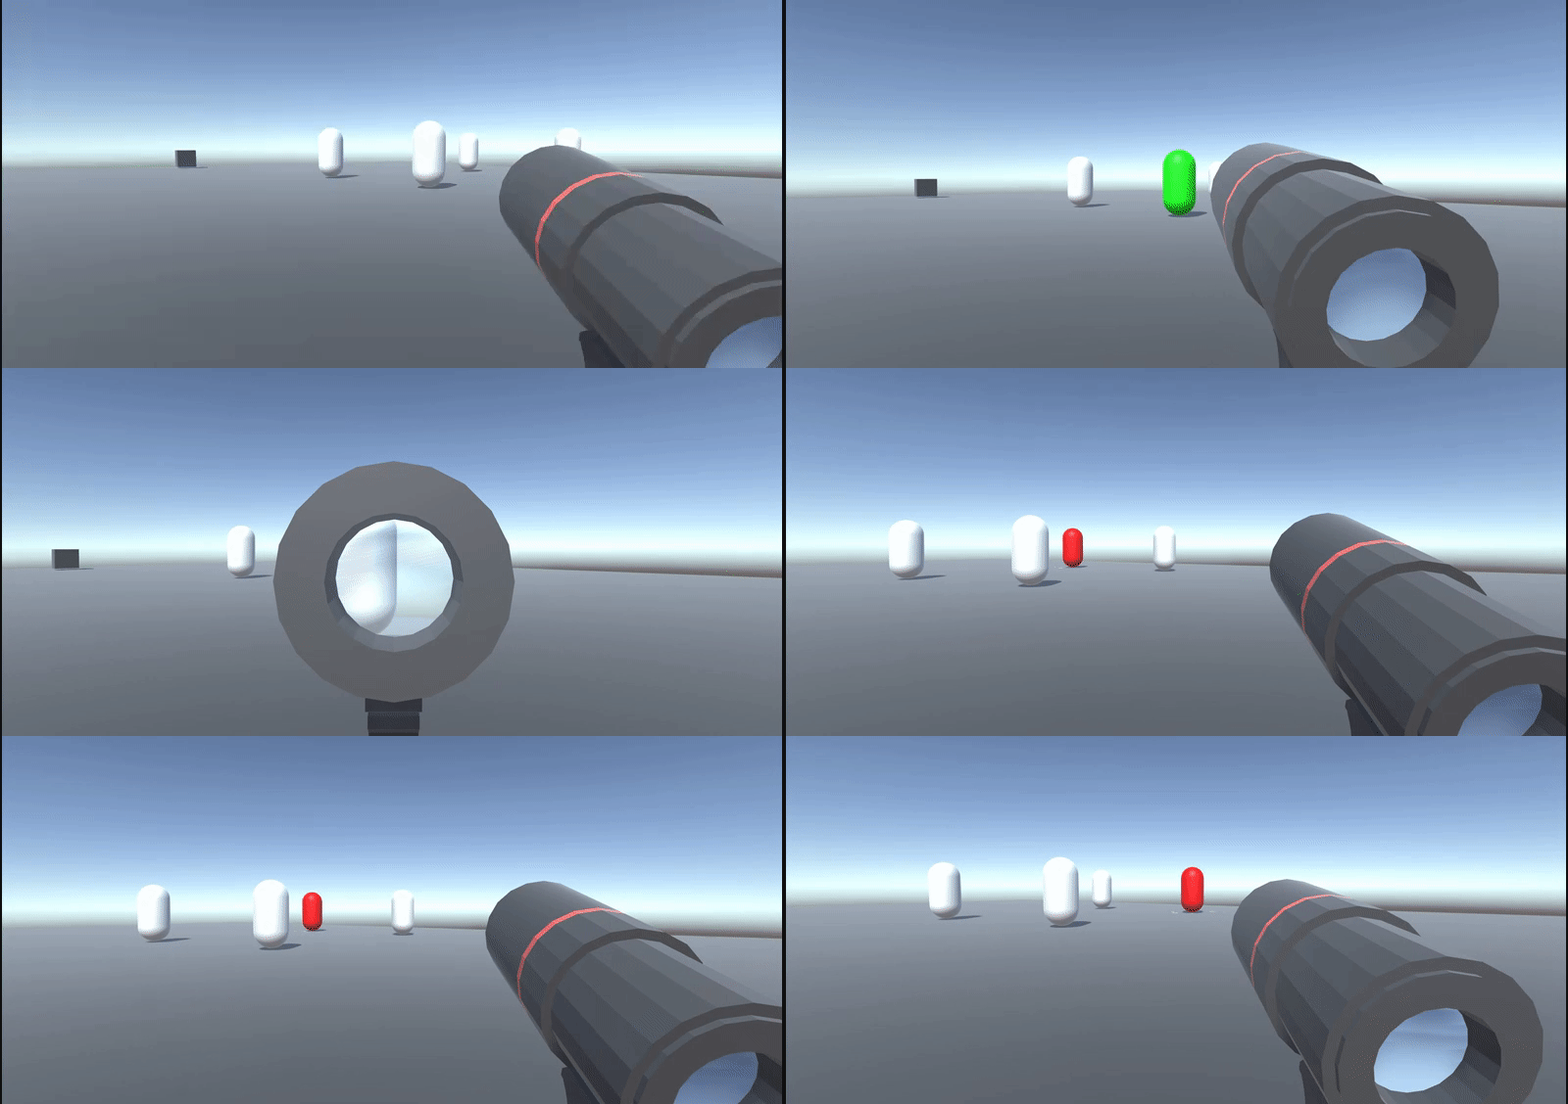

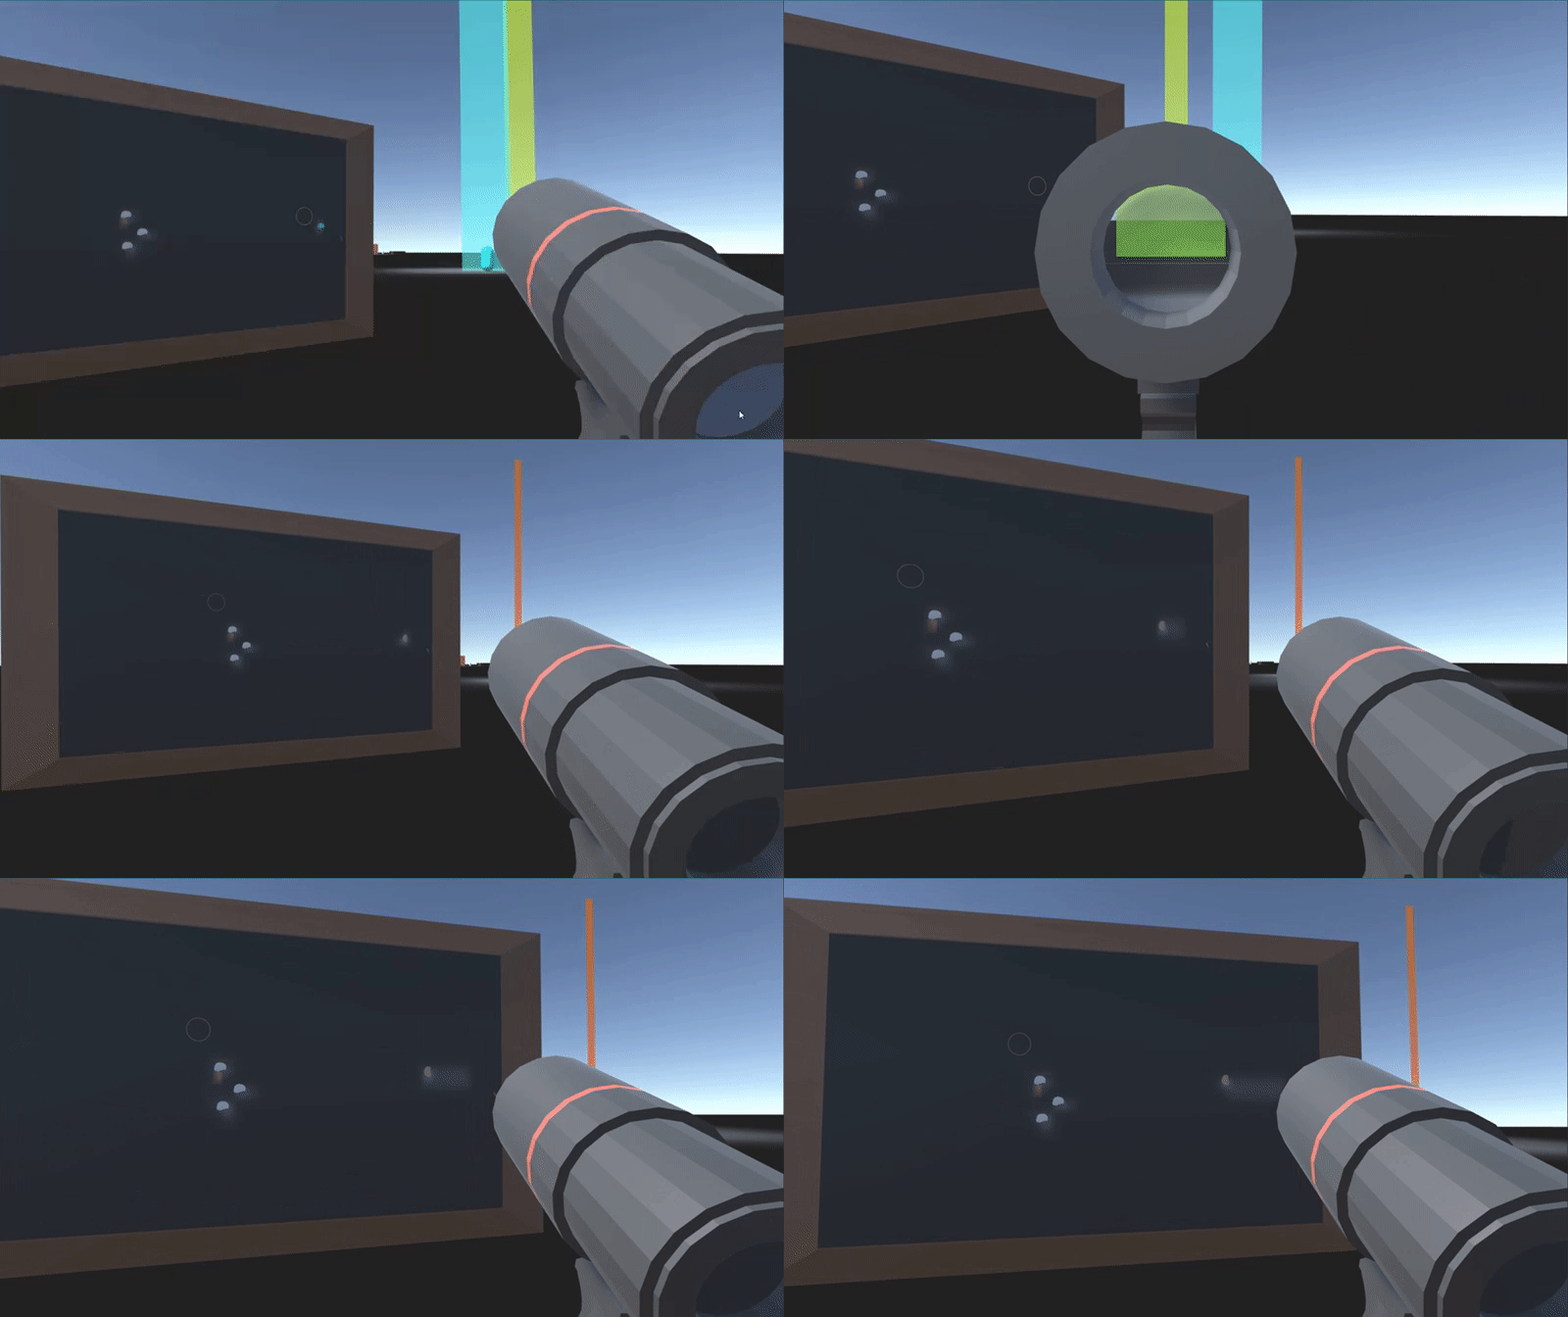
After completing the scope, I got right to work on getting the unit selection functional and adding in interface elements to indicate to players which unit was selected and where it was. I created a simple raycasting system that shoots a ray from an object directly in the center of the scope ring. If it hits a unit, it accesses that unit’s script and sets it as the selected unit. If any other unit is selected while a unit is selected, the unit list is cleared and the newly selected unit is set active.
To indicate the selected unit, I added two interface elements: a large blue beam that shoots into the sky from the unit’s position and a blue material change to the unit’s capsule model. The beam is a simple line renderer that is always in the scene (there isn’t one for each unit) that snaps to the selected unit’s location and activates when a unit is selected. The material change is a very simple material swap.
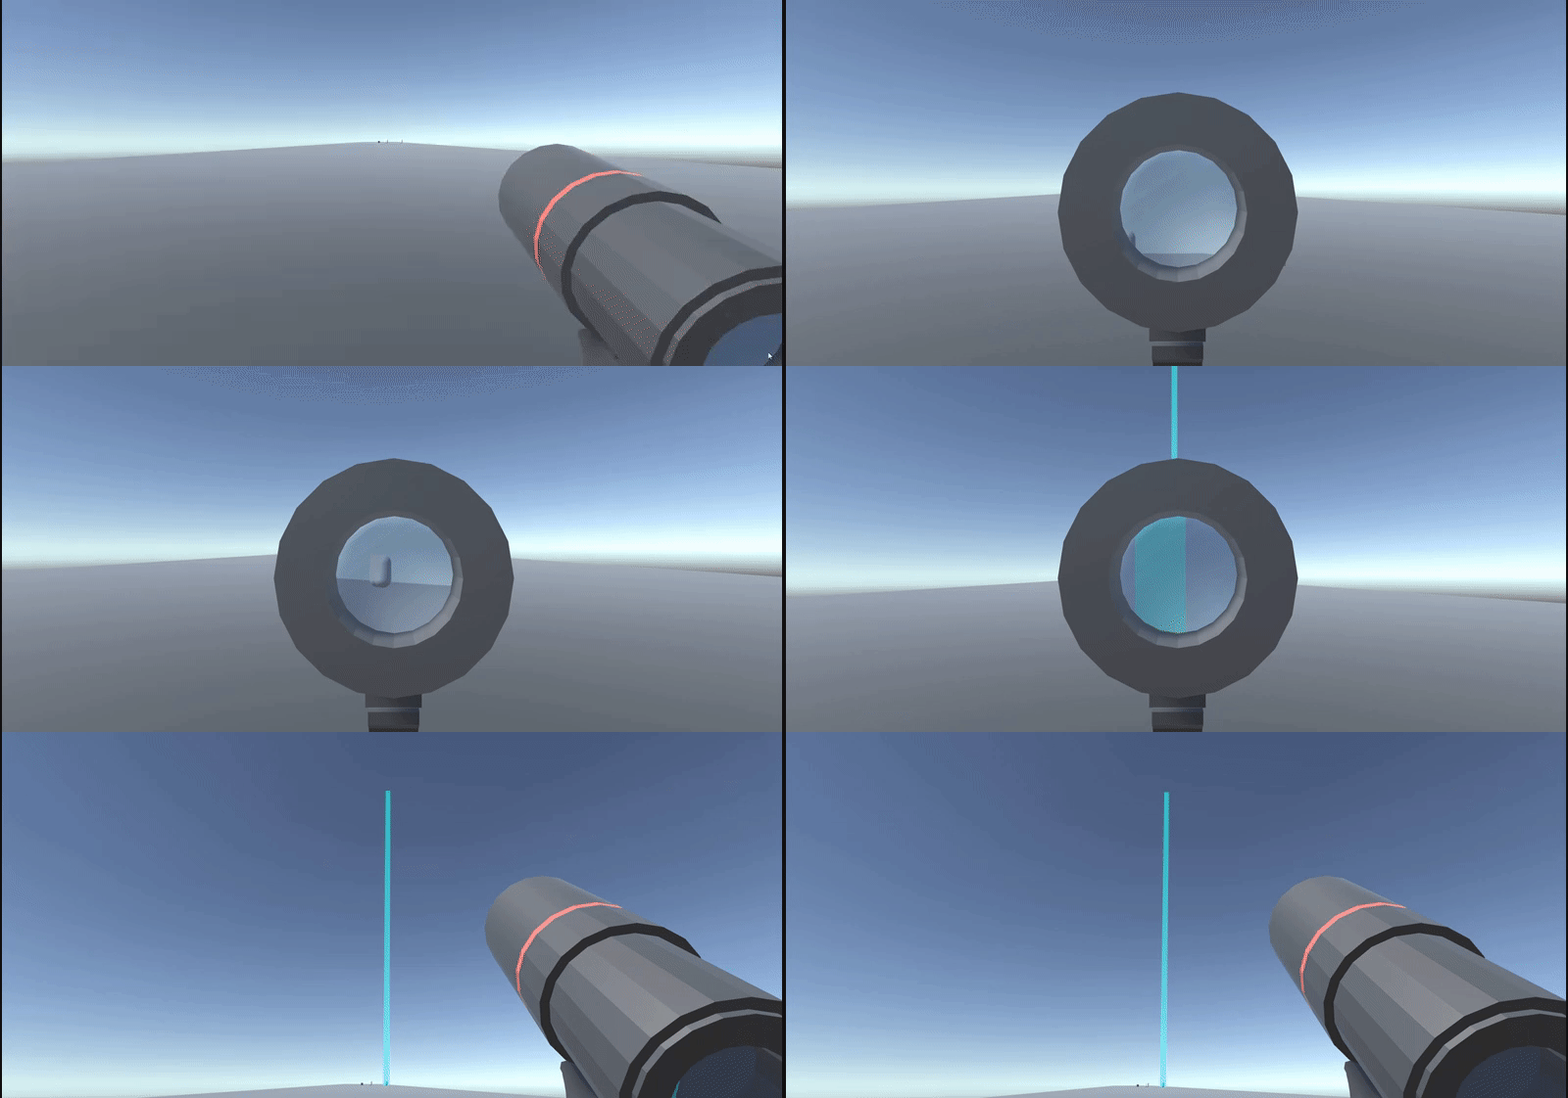
I had unit selection working, but now it was time to make the units move to a location with the right mouse button and give indicators to inform players where the unit would move to once selected. To do this, I added a new function which activates a yellow beam in the scene which follows the hit position of the raycast. This is the movement indicator beam and it exists to tell the player where their unit can move to if they press right click.
I then added another function that spawns a new orange beam at the position of the yellow beam when right mouse is clicked. This is the selected location beam, which indicates where the selected unit will move to. After the selection and order loop was working, I programmed unit movement with a very simple NavMesh set destination that orders the unit to automatically move to the selected location.
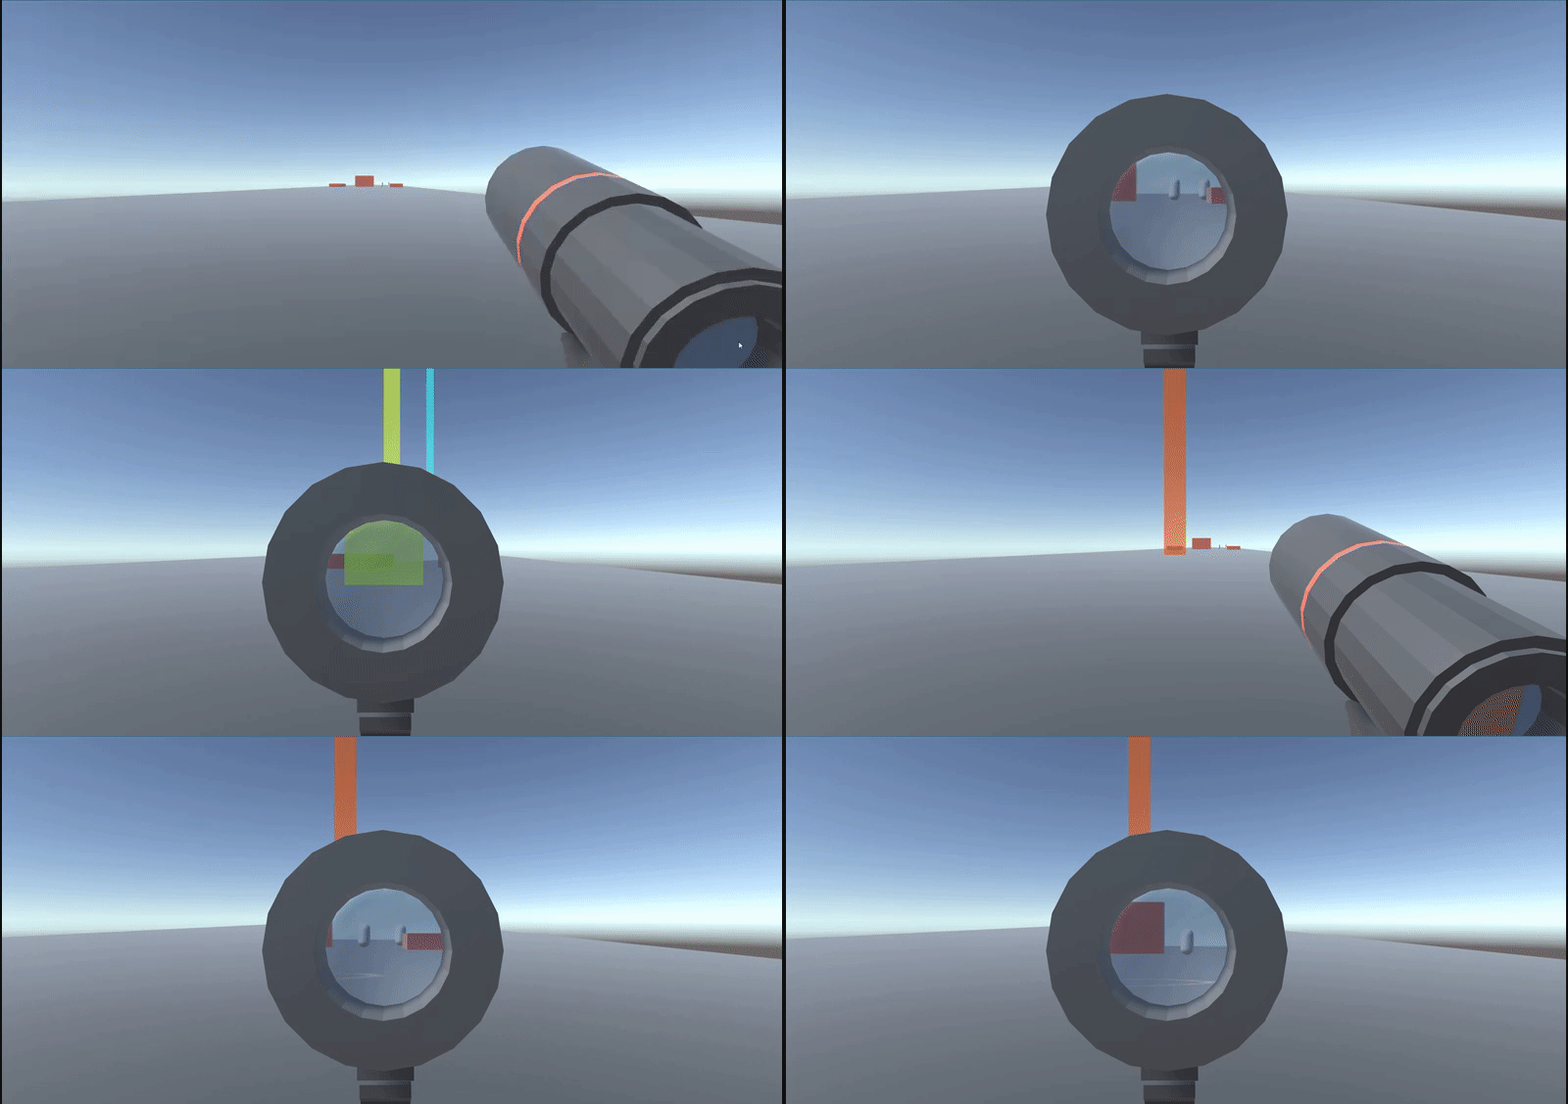


Next came a much greater challenge; adding fog of war to both an ingame map and the 3D space. It took me a little bit to get a map working properly (another render texture plus some icons only rendering on the map camera) but then I hit a block when it came to doing the fog of war for the map. I scoured the internet for references and any help or sample code I could find and came across a fantastic solution to the map based fog of war problem.
This solution uses projectors, render textures, and a shader to project a dark texture onto surfaces that aren’t explored by the units which have a visibility mesh on them. It’s really ingenious, huge props to the original creator Andrew Hung for it! I had to do a lot of tweaking with it to get it to work with my map, but when it did it came out really good and worked as intended.
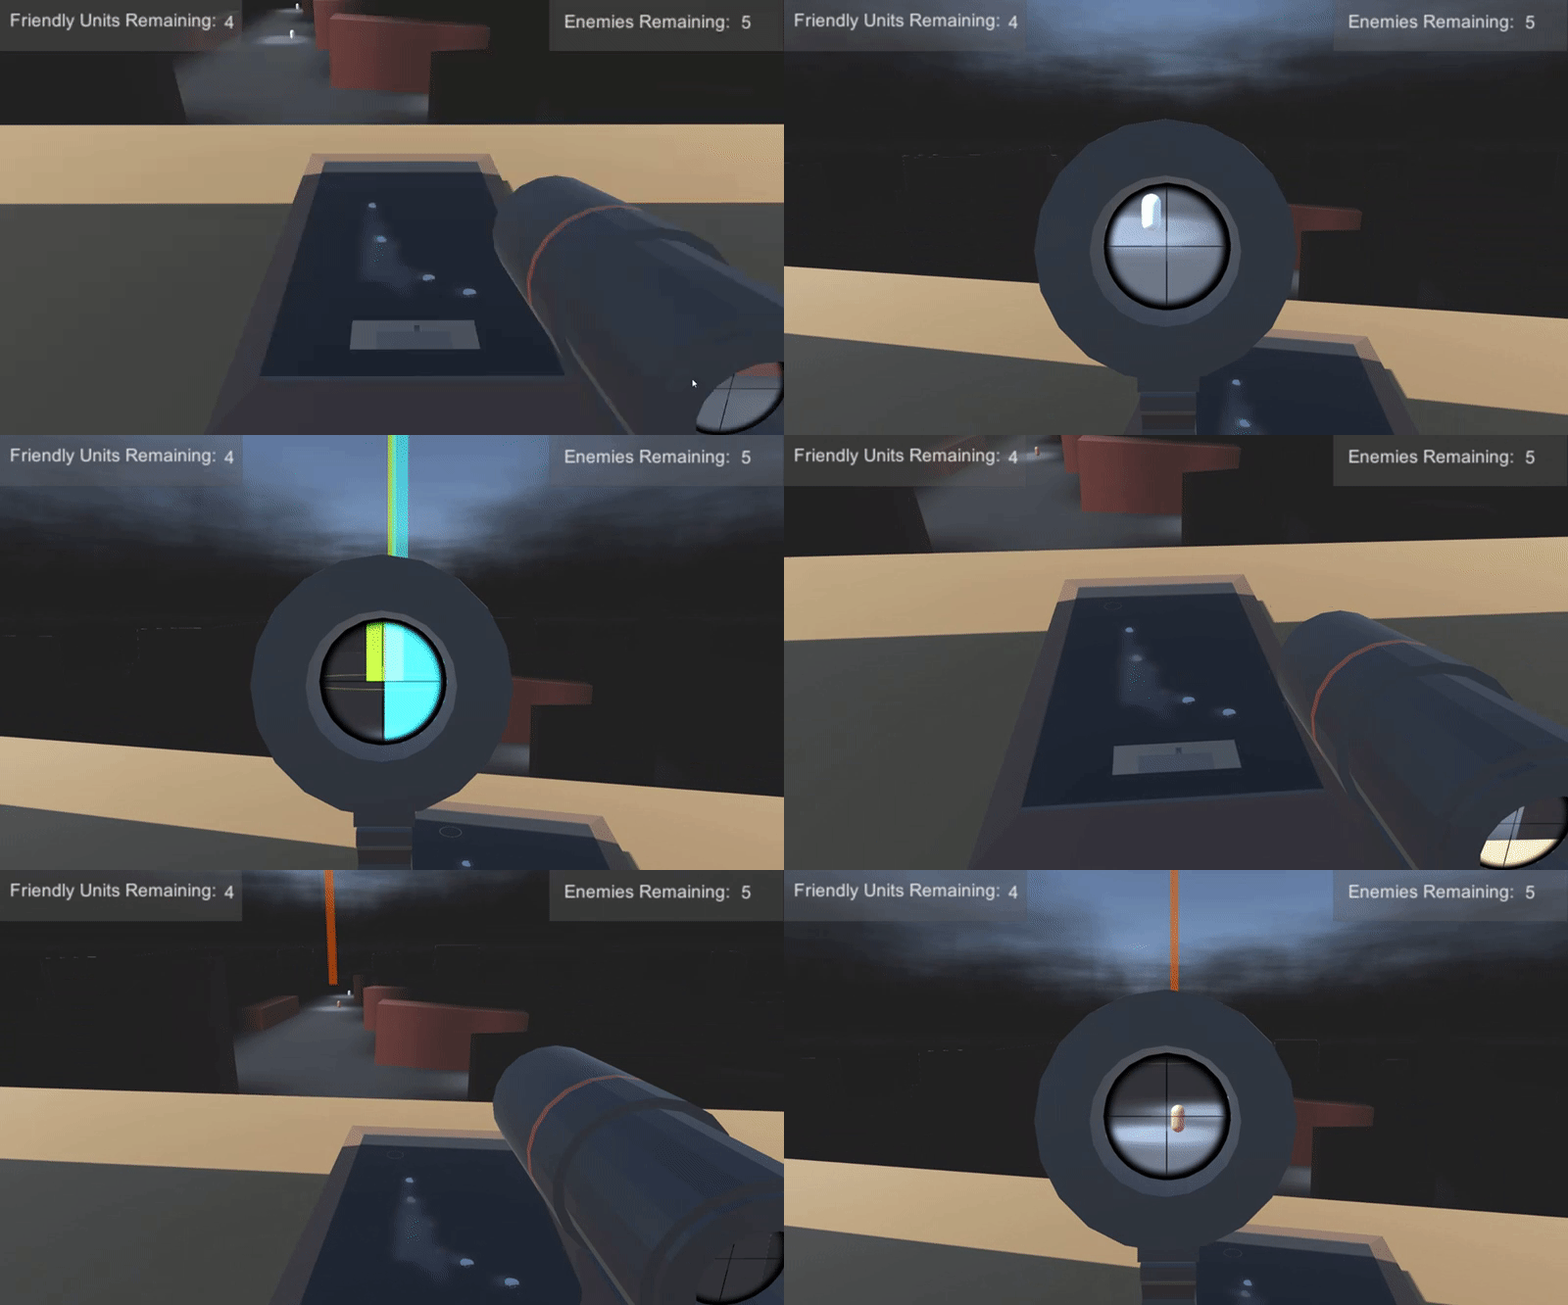
3D dimensional fog of war, however, was a much, much different beast entirely. I had an idea of how to do it (which I ended up implementing…I’m getting there) but I knew that it could be horrifically performance intensive and that the programmers on my Production team would scold me if they found out I did it. Since this is in fact just a prototype and a proof of concept, however, I decided to worry about optimization later and implement my solution anyway. It ended up performing well anyway so all’s well that ends well, but if this was a game with real art assets a new solution would be needed.
What I ended up doing was creating a massive particle system that shoots out a whole bunch of big fog particles. (Yikes! I can hear my computer fans screaming in agony). As the units move, they instantiate empty collider objects that only collide with the particles and kill any particles the instant they intersect. This creates a “clearing” effect around the fog that is actually really convincing. If only it wasn’t so horribly unoptimized…
(For the record, I really wanna keep exploring this type of thing and figure out how to make 3D fog of war that is optimized well!)

I had my scope. I had my units. I had my map. I had my fog. Now all I needed was something for the player to do with it all. For the rest of the creation process (which at this point was 2 days or so, since I spent so much time on everything else) I focused on making a gameplay loop in which the units have to go around the map and reveal the location of 5 hidden enemies that spawn in random places. It ended up being a really straightforward yet time consuming process: make enemy prefab, give it an icon, hide it from the game until it enters a unit’s radius, give it a big marker, count down from enemy list, give enemies and attack radius that kills units after they’re in it for a couple seconds, add win and and lose state for when the enemies are all found or all the units are dead…you get the idea. All really simple stuff that just took a really long time to implement. Once all of this was in place, I ended up with a nice little game loop that worked pretty well and was mostly bug free (enemies spawning in buildings…damn you!)



I originally didn’t plan on having any audio in this system due to time constraints, but after getting tired of programming one day I decided it would be fun (and really helpful to the user interface) to implement some “radio response” sounds. Whenever an action related to the units occurs (i.e selection, movement order, enemy located, unit killed, game won, game lost), the unit radios in to the commander (the player) with an update on their status. When a unit is selected, for example, the unit says “awaiting orders” with nice radio beeps and static behind it. I made these sounds really quickly and easily and they were a lot of fun to make.
I found some great military radio samples in one of my libraries and started messing around with them. I added in a click for the radio button being pushed first which is followed shortly by a beep. As the beep starts, a layer of static comes in along with a voice line that yours truly recorded. Once the voice line is delivered, the click and beep fade again and the static fades out.
I didn’t need to do much effects processing to these since they sounded pretty great and realistic on their own. All I ended up doing on the effects side of things was adding a “Phone” filter effect to the voice lines to make them sound like they were being transmitted. It’s a simple addition that added a lot to the sounds.


Summary
Based on the test results and from watching the testers play the game, I can conclude that this system was a partial success. It was definitely successful in delivering an experience focused on strategy and logic and succeeded in meeting my intent. Testers realized the importance of their own position before moving their units and found the intelligence gathering through the fog of war line of sight both useful and engaging. Parts of the interface were successful in conveying information, namely the unit selection indicator, the fog of war clearing, and the map overview. Other parts of the interface such as unit positions when not selected and the path units would follow failed to easily convey information.
What Worked
1. The controls were easy to use and didn’t overwhelm players.
2. First person movement worked surprisingly well for a real time strategy game. The scope was a good substitute for the “god view” in other strategy games since it let players easily see distant units that weren’t otherwise hard to spot.
3. The two pillars of my intent (strategic positioning of both the player and units, intelligence gathering) were conveyed exactly as envisioned and functioned properly. The environment was successful in getting players to reposition before selecting units and the fog of war succeeded in making the intelligence gathering clear and have an element of uncertainty.
4. Using the “beams” of light for indicators was a good decision. Players found it easy to tell which of their units was selected and where enemies were located in the actual world because of the beams.
5. In general, the map served its main purpose; giving the player a bird’s eye view of the situation and allow them to plan their moves. However, it only allowed them to account for certain information, not all information.
6. The last minute decision to make some sound effects for unit related feedback paid off greatly. Testers not only enjoyed the audio but also reported to me outside the survey (since I had no questions about it) that it fundamentally asisted in helping them know what was going on.
What Didn’t Work
1. The fog of war made it too difficult to see where friendly units were in some cases. This led to confusion as to what was the ground and what was an obstacle.
2. The movement indicator got stuck on obstacles and consequently made it difficult to give movement orders. It was also to difficult to see where the movement indicator actually was in terms of the environment since its ring didn’t light up the surrounding area.
3. The map failed at helping players with unit positioning because it wasn’t instantly usable and didn’t display unit movement paths.
4. Bug: enemies can spawn inside of obstacles. This can lead to some confusing games even though the enemies can still be spotted.
5. The 3D fog of war could potentially be extremely resource demanding on some systems. While all the systems I tested it on ran the game at a very high framerate (upwards of 250fps), older machines might not perform nearly as well.
What I Learned
Perhaps my biggest takeaway from the experience of designing this system was that
nailing the user interface is of the utmost importance when presenting the player with lots of information at once. Much of the time I spent on getting the 3D fog of war to work right and getting the scope looking nice could’ve been better spent on refining and tweaking the UI to
make it give the players all the information they needed. For example, the unit movement paths were a planned feature that I didn’t add because I deemed them non-essential, when it turns out they were absolutely essential for a core part of the strategic element of the game.
I also learned that strategy games don’t have to give players a huge overview of the world at all times to provide them with the information they need to succeed. I think that the success of this system in regards to my intended experience shows that there is potential for strategy games to have a more immersive perspective and feel while still providing all the necessary information to players in an easily viewable and usable way. With more refinement in the UI and some different design decisions, I think that a system like this has potential to be fleshed out into a much bigger game.
Overall, this experiment taught me not to underestimate the power of a good user interface. As a designer that has little experience making UI (I focus on the gameplay side of systems as well as sound), this experiment helped me gain experience working with UI and helped me learn a lot about how to properly implement it so that players can know what they can do, where they can do it, and what the game wants them to do.